There is a specific kind of dread that comes with opening port 443 on your home network to the internet. Within minutes, the invisible army of bots, scanners, and malicious scripts starts knocking at your door.
For a long time, I just accepted this as the cost of self-hosting. But this morning, I woke up and checked my notifications. Waiting for me was a beautiful stream of automated alerts: my server had silently detected, blocked, and banned over half a dozen malicious IP addresses while I was fast asleep.
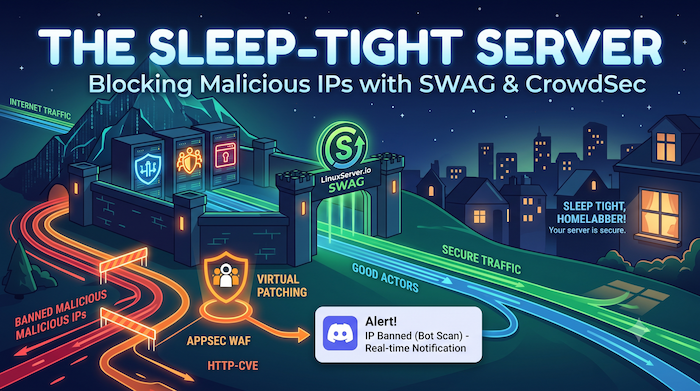
The secret? I recently upgraded my SWAG (Secure Web Application Gateway) setup to use CrowdSec, complete with their new AppSec Web Application Firewall (WAF) rules. In this post, I am going to show you exactly how to turn your reverse proxy into an automated, self-updating fortress.
Why SWAG & CrowdSec?
When you are running a home lab, exposing services is just part of the fun. Whether you are throwing an authentication portal like Authelia in front of your apps, or exposing a Dozzle dashboard to keep an eye on your container logs on the go, a reverse proxy is mandatory.
For years, LinuxServer.io's SWAG (Secure Web Application Gateway) has been my go-to. It handles Let's Encrypt certificates flawlessly and routes traffic perfectly. To protect those exposed apps, the standard recommendation was always Fail2Ban.
Fail2Ban is a great tool, but it has a fundamental limitation: it operates in a silo. It is like a bouncer who only learns about a troublemaker after they have already started a fight in your specific bar.
CrowdSec changes the game entirely. Instead of a lone bouncer, CrowdSec acts like a global neighborhood watch network. If a malicious IP address attacks a server in Tokyo, that behavior is reported, verified, and that IP is instantly banned across the entire CrowdSec network, including your home server.
But what really sold me wasn't just the IP bans; it was the new AppSec Web Application Firewall (WAF). CrowdSec can now actively inspect the actual traffic payloads for exploits and drop the connection before the bad actor even touches your backend containers.
Trying SWAG & CrowdSec Together
The brilliant team over at LinuxServer.io published an excellent guide on blocking malicious connections with CrowdSec and SWAG, which even walks through setting up Discord notifications for your bans. I used their tutorial as my foundation with some tweaks.
# simplified example
services:
  swag:
    image: lscr.io/linuxserver/swag:latest
    container_name: swag
    cap_add:
      - NET_ADMIN
    environment:
      - PUID=${PUID}
      - PGID=${PGID}
      - TZ=${TZ}
      - URL=${SWAG_URL}
      - VALIDATION=http
      # This is the magic line that installs the CrowdSec integration!
      # If using Cloudflare, this ensures CrowdSec sees the attacker's real IP instead of Cloudflare's
      - DOCKER_MODS=linuxserver/mods:swag-crowdsec|linuxserver/mods:swag-cloudflare-real-ip
      # A secure key so SWAG and CrowdSec can communicate (generated with: openssl rand -hex 32)
      - CROWDSEC_API_KEY=${CROWDSEC_API_KEY}
      - CROWDSEC_LAPI_URL=http://crowdsec:8080
    volumes:
      - ${DOCKER_BASE_DIR}/swag/config:/config
    ports:
      - 443:443
      - 80:80
    restart: unless-stopped

  crowdsec:
    image: docker.io/crowdsecurity/crowdsec:latest
    container_name: crowdsec
    environment:
      - GID=1000
      - COLLECTIONS=crowdsecurity/nginx crowdsecurity/http-cve crowdsecurity/whitelist-good-actors crowdsecurity/appsec-generic-rules crowdsecurity/appsec-virtual-patching
      - CUSTOM_HOSTNAME=${SWAG_URL}
    volumes:
      - ${DOCKER_BASE_DIR}/crowdsec/config:/etc/crowdsec:rw
      - ${DOCKER_BASE_DIR}/crowdsec/data:/var/lib/crowdsec/data:rw
      - ${DOCKER_BASE_DIR}/swag/log/nginx:/var/log/swag:ro
      - /var/log:/var/log/host:ro
    restart: unless-stopped
    security_opt:
      - no-new-privileges=true
Breaking Down the Magic
There are two critical pieces making this work:
The API Key: SWAG acts as the "Bouncer" (the enforcement node), but CrowdSec acts as the "Brain" (the decision maker). They need a secure way to talk to each other locally, which is handled by the
CROWDSEC_API_KEYand theCROWDSEC_LAPI_URL.Shared Logs and Collections: Notice how we mount SWAG's Nginx logs directly into the CrowdSec container as read-only (
:ro). CrowdSec constantly watches these logs. We also define a specific list of COLLECTIONS as an environment variable, this tells CrowdSec exactly what kind of malicious behavior to look out for.
The Secret Sauce: AppSec and Virtual Patching
You may have noticed the long COLLECTIONS environment variable in the Docker Compose file. This is where CrowdSec transforms from a simple log analyzer into a full-fledged Web Application Firewall (WAF).
By chaining these specific collections together, we are building a layered defense system. Let's break down what each one actually does in plain English:
crowdsecurity/nginx: This is the foundation. It teaches CrowdSec exactly how to read and understand the standard Nginx access and error logs that SWAG generates.crowdsecurity/whitelist-good-actors: This collection is a lifesaver. It automatically whitelists known good actors like search engine crawlers (Googlebot, Bing), trusted partners like Cloudflare, and public DNS resolvers. This ensures you don't accidentally ban friendly traffic.crowdsecurity/http-cve: This collection continuously scans your logs for patterns matching the exploitation of specific, known HTTP vulnerabilities.crowdsecurity/appsec-generic-rules: This is the core of the new WAF. It actively inspects traffic and blocks common web application attacks, like SQL injections (SQLi) or Cross-Site Scripting (XSS), before they ever reach your backend containers.crowdsecurity/appsec-virtual-patching: This is arguably the coolest feature in this entire stack. When a major new vulnerability is discovered in a popular app, attackers start exploiting it immediately. Virtual patching acts as a temporary shield, targeting and blocking those specific new exploits at the proxy level. It protects you during that terrifying gap between a vulnerability being announced and you actually having the time to update your self-hosted apps.
Instead of just banning an IP address after it repeatedly fails to log in, this AppSec configuration actively drops the connection the second an attacker tries to send a malicious payload.
The Final Connections: Logs and Discord Alerts
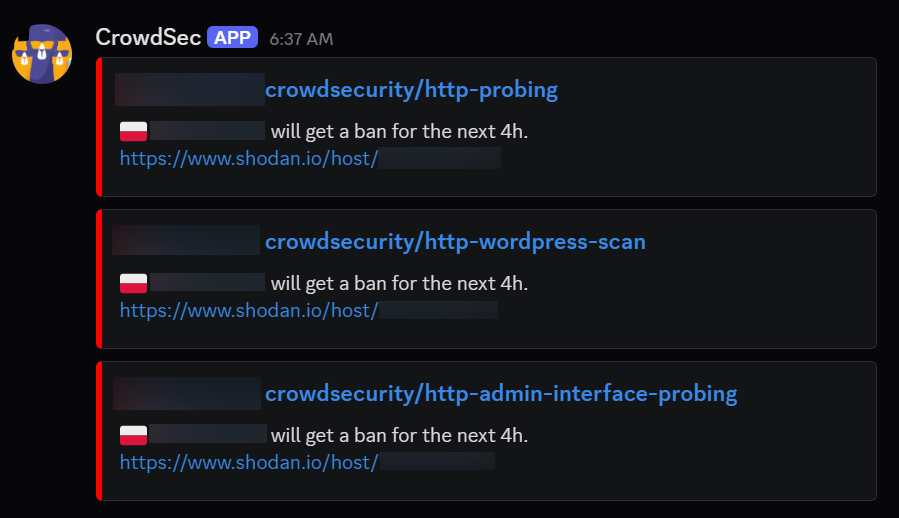
At this point, SWAG and CrowdSec are running, and the WAF collections are locked and loaded. But there are two final pieces to the puzzle: we need to tell CrowdSec where to find SWAG’s logs, and we need to set up those sweet, sweet Discord notifications.
CrowdSec Logs
To tell CrowdSec how to read our SWAG traffic, we need to modify the acquis.yaml file (found in your CrowdSec configuration folder). This file maps log directories to the collections we installed earlier.
Here is the exact configuration I used:
filenames:
  - /var/log/host/auth.log*
labels:
  type: syslog
---
filenames:
  - /var/log/swag/*
labels:
  type: nginx
The Payoff: Discord Webhook Notifications
Now for the fun part: getting notified when your server drops the hammer on a bad actor. CrowdSec uses an HTTP notification plugin to send alerts to Discord via webhooks.
- Create
discord.yamlfile within CrowdSec's/config/notifications/directory:
type: http

name: discord

log_level: info

format: |
  {
    "content": null,
    "embeds": [
      {{range . -}}
      {{$alert := . -}}
      {{range .Decisions -}}
      {{if $alert.Source.Cn -}}
      {
        "title": "{{$alert.MachineID}}: {{.Scenario}}",
        "description": ":flag_{{ $alert.Source.Cn | lower }}: {{$alert.Source.IP}} will get a {{.Type}} for the next {{.Duration}}. <https://www.shodan.io/host/{{$alert.Source.IP}}>",
        "url": "https://db-ip.com/{{$alert.Source.IP}}",
        "color": "16711680"
      }
      {{end}}
      {{if not $alert.Source.Cn -}}
      {
        "title": "{{$alert.MachineID}}: {{.Scenario}}",
        "description": ":pirate_flag: {{$alert.Source.IP}} will get a {{.Type}} for the next {{.Duration}}. <https://www.shodan.io/host/{{$alert.Source.IP}}>",
        "url": "https://db-ip.com/{{$alert.Source.IP}}",
        "color": "16711680"
      }
      {{end}}
      {{end -}}
      {{end -}}
    ]
  }

url: <DISCORD_WEBHOOK_URL>

method: POST

headers:
Content-Type: application/json- Enable notifications within the
profiles.yamlas such:
name: default_ip_remediation
# ...
notifications:
  - discord
---
name: default_range_remediation
# ...
notifications:
  - discord
Wrapping Up: Sleep Tight, Homelabbers
Securing a home server shouldn't require a Ph.D. in cybersecurity, and it certainly shouldn't require you to constantly monitor your logs like a hawk.
By using CrowdSec and leveraging LinuxServer's incredible SWAG container, you are no longer fighting the internet alone. You are tapping into a global neighborhood watch and utilizing virtual patching to block exploits before you even have to think about updating your backend apps.
Seeing that stream of Discord notifications every morning is a fantastic reminder that your infrastructure is quietly doing the heavy lifting for you. You can finally expose those self-hosted services with a bit more peace of mind knowing the front door is properly deadbolted.